Yes, Vittorio Gassman played the violin. He was a talented actor and musician.
Born in Italy in 1922, Gassman was renowned for his versatile performances on stage and screen. He was equally adept at comedy and drama, with an ability to capture the nuances of each character he portrayed. Alongside his successful acting career, Gassman’s love for music was evident throughout his life.
While he is best known for his acting, his skills as a violinist added another dimension to his artistic prowess. Gassman’s talent and passion for the violin further solidified his status as a multidimensional artist. His ability to captivate audiences extended beyond acting and into the realm of music, leaving a lasting impression on those who experienced his performances.
Did Vittorio Gassman Play The Violin
Unveiling Vittorio Gassman’s Musical Pursuits
Vittorio Gassman, a renowned Italian actor, was also a passionate violinist. His artistic pursuits extended beyond acting, showcasing his multifaceted talents. Gassman’s musical proclivity mesmerized audiences and unveiled a lesser-known facet of his artistic background.
Despite primarily gaining acclaim in the cinematic realm, his proficiency in playing the violin added a captivating dimension to his illustrious career. The synthesis of his acting prowess with his musical inclinations illustrated the intricate synergy between the two art forms. Gassman’s versatile abilities and extensive contributions not only as an actor but also as a musician epitomize his extraordinary legacy.
Did Gassman Strum The Violin Cords?
Vittorio Gassman was renowned for his acting prowess, but the question remains – did he also showcase his musical talent with the violin? Various testimonies from colleagues and friends provide insight into his musical abilities, while Gassman’s own statements about music offer further evidence. Assessing the myths versus reality surrounding his violin playing has led to intriguing findings, shedding light on this lesser-known aspect of his life. The analysis of these sources contributes to a more holistic understanding of Gassman’s talents and interests beyond the realm of acting.
Uncovering Gassman’s Hidden Melodies
Vittorio Gassman, one of the most celebrated actors in Italian cinema, is known for his versatile performances. However, his musical talents remain relatively lesser-known to many. Throughout his illustrious career, there have been several instances where Gassman exhibited his prowess with the violin on screen.
These musical displays not only showcased his acting skills but also provided a glimpse into his multifaceted abilities. Additionally, delving into the behind-the-scenes stories of Gassman’s encounters with the violin offers a deeper understanding of his passion for music. In comparison to other classical actor-musicians, Gassman’s approach and dedication to the violin add a unique dimension to his legacy.
Gassman’s Legacy Beyond Acting
Did you know that Vittorio Gassman was not only a renowned actor, but also a skilled violinist? His rumored violin abilities seemed to have influenced his acting style, contributing to his multifaceted legacy. Gassman’s impact on theatrical music interpretation has left a lasting impression on the performing arts world. His rumored violin skills, whether confirmed or not, have added an intriguing layer to his artistic persona. Preserving the various facets of Gassman’s legacy, including his potential musical talents, is crucial for future generations to appreciate and understand the depth of his contributions to the arts.
Frequently Asked Questions For Did Vittorio Gassman Play The Violin
Did Vittorio Gassman Have A Musical Background?
Yes, Vittorio Gassman was not only a renowned actor but also a talented musician with a deep love for music. He played the violin skillfully and his musical abilities added a captivating layer to his versatile artistic talents.
What Influence Did Violin Playing Have On Gassman’s Career?
Playing the violin greatly influenced Gassman’s career, as it instilled in him a sense of discipline, precision, and passion that he later applied to his acting. His musical background shaped his expressive abilities, adding a depth and sensitivity to his performances that set him apart.
How Did Gassman’s Violin Playing Impact The Arts Community?
Gassman’s skillful violin playing resonated deeply within the arts community, garnering admiration from fellow actors, musicians, and artists. His musical proficiency inspired and influenced others, showcasing the interconnectedness of the arts and leaving a lasting impact on the creative world.
Conclusion
Vittorio Gassman’s talent extended beyond acting to the violin. His dedication to the instrument showcased his versatility and passion. Whether on screen or with a violin in hand, Gassman’s artistry captivated audiences. His legacy lives on in his performances, leaving an indelible mark on the world of entertainment.
To clean violin strings, use a soft, lint-free cloth to wipe each string individually. Gently rub the cloth along the length of each string to remove rosin and dirt buildup.
Maintaining clean strings is essential for the sound quality and longevity of your violin. To ensure your instrument produces the best possible sound, regular cleaning and maintenance of the strings are crucial. Proper cleaning of the violin strings not only enhances the tone but also prolongs their lifespan, saving you money in the long run.
In this guide, we will discuss the step-by-step process to effectively clean your violin strings and keep them in optimal condition. Following these simple techniques will help you maintain the quality sound of your instrument and extend the life of your strings.
Cleaning your violin strings regularly is essential for maintaining the quality of your instrument. Dirt and rosin buildup can significantly impact the sound quality of your violin, leading to a dull and muted tone. By keeping your strings clean, you can preserve the bright and resonant sound that is vital for a superior musical performance.
Additionally, regular string cleaning offers longevity benefits for both your strings and violin, prolonging their lifespan. This simple maintenance practice can contribute to the overall performance and durability of your instrument. Incorporating a routine string cleaning regimen is a small yet crucial step in caring for your violin and maintaining its optimal performance.
Pre-clean Preparations
Gather the necessary cleaning materials, including a soft cloth, violin polish, and rosin remover. Ensure the violin is placed securely on a stable surface. Additionally, take safety precautions for the violin and strings, such as loosening the strings slightly before cleaning to prevent damage and removing excess rosining to avoid staining.
Cleaning Your Violin Strings Step-by-step
Wiping away rosin after each playing session is crucial for maintaining the quality of your violin strings. Use a soft, lint-free cloth to ensure that no residue is left behind. When selecting the right type of cloth for cleaning, avoid materials that may cause abrasion or leave lint on the strings. Microfiber or cotton cloths are ideal for this task.
Proper technique for wiping strings involves running the cloth along each string individually, applying gentle pressure to remove rosin buildup. Start from the top and work your way down to ensure thorough cleaning. By following these steps, you can effectively clean your violin strings and keep them in optimal condition.
Advanced Cleaning Methods
When cleaning violin strings, it is important to use specialized string cleaners to ensure thorough and safe cleaning. Avoid using alcohol as it can damage the strings, particularly gut and synthetic ones. Instead, opt for gentle cleaners designed specifically for violin strings. For stubborn grime, gently rub the affected areas with a microfiber cloth dampened with a small amount of the cleaner. It is essential to be gentle to avoid damaging the strings. By following these advanced cleaning methods, you can effectively maintain the quality and condition of your violin strings.
Preventive Measures For String Care
Preventive Measures for String Care: Proper maintenance of the violin strings is essential to ensure longevity and optimal performance. This can be achieved through correct rosin application, ensuring the strings are handled with clean hands, and storing the violin properly.
Correct rosin application: Apply rosin evenly on the strings to maintain the right grip and prevent excess buildup, which can affect the sound quality.
Handling strings with clean hands: Always ensure your hands are clean before touching the violin strings to avoid transferring dirt and oils, which can deteriorate the string quality.
Storing your violin properly: Store the violin in a protective case, away from extreme temperatures and humidity, to prevent damage to the strings and maintain their condition.
Common Violin String Cleaning Mistakes
Cleaning violin strings is essential to maintain their longevity and sound quality. However, it’s crucial to avoid over-cleaning as it can lead to premature degradation. Using abrasive materials during the cleaning process can cause damage to the strings, impacting their durability and performance. Additionally, excessive moisture while cleaning can lead to oxidation and rust, affecting the overall sound of the instrument. Therefore, it’s important to follow proper cleaning techniques and use gentle materials, such as microfiber cloths, to effectively remove rosin buildup without causing harm to the strings. By understanding and avoiding these common mistakes, violinists can ensure their instrument’s strings remain in optimal condition.
Beyond Cleaning: Regular Violin Maintenance
Cleaning Violin Strings: To maintain the quality of your violin strings, it is essential to regularly clean them with a soft, dry cloth after each use. This helps remove rosin build-up and prolongs the lifespan of the strings. Additionally, using a small amount of rubbing alcohol on the cloth can aid in removing stubborn residue.
Scheduling professional check-ups: It is advisable to schedule regular check-ups with a professional violin luthier who can assess the overall health of the instrument, including the strings, bridge, and soundpost. This proactive approach can help identify any issues early on and ensure the violin is in optimal playing condition.
Replacing strings as needed: Monitor your violin strings regularly for signs of wear, such as fraying or loss of tone quality. When the strings show signs of deterioration, promptly replace them to maintain the instrument’s sound quality and playability.
Monitoring bridge and soundpost health: Regularly inspect the violin’s bridge and soundpost for any signs of warping, cracking, or misalignment. If any issues are detected, seek professional assistance to address these concerns and ensure the structural integrity of the instrument.
Frequently Asked Questions Of How To Clean Violin Strings
How Often Should Violin Strings Be Cleaned?
Violin strings should be cleaned every 1-2 months to maintain their tone and extend their lifespan. Regular cleaning removes rosin build-up and preserves the quality of sound.
What Is The Best Way To Clean Violin Strings?
The best way to clean violin strings is to use a soft, lint-free cloth dampened with isopropyl alcohol. Gently wipe the strings in a downward motion to remove rosin and dirt.
Can I Use Household Cleaners To Clean Violin Strings?
It is not recommended to use household cleaners on violin strings as they can damage the strings and affect the sound quality. Stick to using isopropyl alcohol and a soft cloth for cleaning.
Conclusion
Proper maintenance of your violin strings is vital for maintaining the quality of your instrument. By following the steps outlined in this post, you can ensure that your violin strings remain in top condition for a longer period of time.
Regular cleaning and maintenance will help to preserve the sound and tone of your violin. Keep your instrument sounding its best by incorporating these simple cleaning techniques into your regular maintenance routine.
Davidson Violins offers a wide selection of high-quality violins, catering to musicians at all levels. Whether you’re a beginner or a seasoned professional, Davidson Violins provides expertly crafted instruments to meet your needs.
With a commitment to exceptional craftsmanship and superior sound, their violins are meticulously designed to deliver outstanding performance. Each violin is expertly crafted by skilled luthiers, ensuring the utmost attention to detail and quality. Davidson Violins is dedicated to providing musicians with exceptional instruments that inspire creativity and elevate their musical experience.
From timeless classics to modern designs, their collection encompasses a diverse range of styles, making them a go-to destination for all violin enthusiasts. With a focus on precision, artistry, and innovation, Davidson Violins is a trusted choice for musicians seeking top-tier instruments.
Davidson Violins
The Heritage Of Davidson Violins
Davidson Violins have a rich heritage that spans generations, rooted in traditional craftsmanship techniques and a commitment to excellence. The company’s devotion to violin craftsmanship traditions has been a defining characteristic since its inception. Each violin tells a story of evolutionary design techniques, showcasing the mastery and intricacy of Davidson’s work.
Artisans Behind Davidson Violins
Davidson Violins is a testament to the artistry and dedication of its master luthiers. Each artisan at Davidson Violins possesses a unique and fascinating journey in the world of craftsmanship. From learning the intricacies of violin making to perfecting their skills, these artisans have honed their craft with passion and precision. The profiles of these master luthiers reveal the rich history and expertise behind each violin created at Davidson Violins.
Their commitment to quality and tradition shines in every instrument, showcasing true craftsmanship mastery. Davidson Violins’ heritage and artistic excellence testify to the unparalleled skill and dedication of its artisans.
Precision-crafted violins showcasing mastery.
Renowned for their unparalleled precision and expert craftsmanship, Davidson Violins epitomize the pinnacle of musical artistry. Each violin represents a harmonious blend of tradition and innovation, meticulously handcrafted by skilled artisans with a profound dedication to their craft.
The attention to detail in every curve, joint, and finish showcases a level of mastery that transcends mere musical instruments, transforming each violin into a timeless work of art. Each instrument is a testament to the rich history and tradition of violin-making, ensuring that every note played resonates with the legacy of centuries-old craftsmanship.
Stradivarius model
Hand-carved spruce and maple
Expertly applied varnish
Perfectly balanced sound
Detailed inlays and scroll
Masterpiece showcasing centuries of tradition and artistry
Expertly-made instruments for unparalleled performance.
Exemplifying the epitome of superior musical instruments, Davidson Violins stand as a testament to exceptional artistry and unmatched performance. By harmoniously integrating cutting-edge techniques with time-honored traditions, each instrument is meticulously crafted to exceed the standards of excellence.
The unparalleled precision and expert craftsmanship evident in every aspect of the violin’s construction assure musicians of a refined and unparalleled performance experience. From the selection of the finest materials to the intricate detailing and flawless finish, Davidson Violins embody a dedication to creating instruments that transcend expectations, elevating every musical performance with unparalleled sophistication and brilliance.
Handcrafted violins with exquisite tone and unparalleled resonance.
Expertly carved scroll for superior playability and refined aesthetics.
Tailpiece designed for optimal string tension and precise tuning stability.
Premium spruce and maple construction for exceptional durability and sound.
Fine-tuned pegs and fingerboard for effortless tuning and smooth playing.
Customized varnish finish offering both protection and stunning visual appeal.
Fine craftsmanship that astounds players.
Demonstrating a level of craftsmanship that resonates with players on a profound level, each Davidson Violin encapsulates a blend of technical mastery and artistic finesse that captivates musicians from all walks of life. The intricate detailing and expert precision imbued in every curve and contour of these violins are a testament to the dedication and passion that goes into their creation.
Players find themselves astounded by the nuanced tonal qualities and superior playability that are the hallmark of fine craftsmanship, as each instrument becomes an extension of the artist’s musical expression. The artistry and attention to detail in Davidson Violins elevate the playing experience to new heights, inspiring musicians to unlock their full potential and immerse themselves in the enchanting world of music.
Precision hand-carved details
Rich, resonant tones that captivate audiences
Flawless varnish finish for aesthetic appeal and durability
Superior tonal quality sought after by top musicians worldwide
Individually crafted for personalized touch and exceptional sound projection
Exquisite design showcasing decades of artisanal expertise and dedication
Materials And Techniques
Davidson Violins are crafted using only the finest woods carefully selected by experienced luthiers. The materials utilized in the construction of the violins play a pivotal role in defining the quality and tone of the instrument. The luthiers’ expert hands, equipped with specialized tools, ensure precision and craftsmanship that result in exceptional instruments. The selection of fine woods and tools of the luthier’s trade harmonize to create the renowned Davidson Violins.
Crafting A Davidson Violin
Crafting a Davidson Violin involves a meticulous process that begins with selecting high-quality wood for the body. The top, back, and sides of the violin body are expertly carved to precision, ensuring optimal resonance and tone. Skilled luthiers then carve the scroll and carefully assemble the components, paying careful attention to every detail.
The body is sealed with a protective varnish, enhancing its durability and aesthetic appeal. Fine-tuning the acoustics is a critical stage, as the soundpost and bass bar are meticulously positioned to achieve perfect harmonics and projection, essential for a superior instrument. The final steps involve fitting the neck and fingerboard, along with the installation of the bridge and tailpiece to complete the violin, ready for the musician to impart its soulful music.
Expert Craftsmanship: The Davidson Touch
Davison Violins are expertly crafted with the finest materials and attention to detail. The signature finishing details set them apart, showcasing the meticulous craftsmanship that goes into every instrument. Each violin undergoes rigorous quality assurance to ensure it meets the highest standards. From the selection of premium woods to the final touches, Davidson Violins bear the mark of excellence. The result is a instrument that not only sounds beautiful, but is also a testament to the dedication and skill of the craftsmen behind it.
The Sound Of Davidson Violins
Davidson violins are known for their exceptional acoustic characteristics. The tonal quality of Davidson violins is highly revered in the music industry, boasting a rich and vibrant sound that resonates with depth and clarity. Musicians and enthusiasts often compare the tonality of Davidson violins to those of renowned masterpieces, recognizing the distinct comparisons in violin tonality.
Custom Creations And Clientele
Davidson Violins specializes in custom creations for musicians seeking tailored experiences. With a commitment to impeccable craftsmanship, our bespoke instruments have earned the favor of notable performers and discerning patrons. Each creation is imbued with a unique blend of artistry and precision, tailored to the distinctive needs and preferences of the musician. From renowned soloists to esteemed orchestral players, our clientele represents a diverse array of musical talents who seek instruments that embody their individuality and elevate their performances.
Preserving And Maintaining The Instruments
Davidson violins require proper care and maintenance to ensure their longevity and performance. Best practices for care include storing the instruments in a stable environment, away from extreme temperatures and humidity. Regularly cleaning and maintaining the strings, fingerboards, and bodies is essential to preserve their sound quality and appearance. Repair and restoration services should be handled by experienced professionals who specialize in violins, ensuring that any damage is addressed effectively.
Accessing Davidson Violins
If you are searching for high-quality violins, Davidson Violins offers a wide range of options. The company has showrooms and locations in various cities, providing opportunities for customers to experience the ownership firsthand. With a focus on customer satisfaction, Davidson Violins also showcases testimonials from happy customers.
This helps potential buyers gain insight into the quality and performance of the violins. The availability of showrooms and the provision of testimonials add value to the brand, enabling customers to make informed decisions when purchasing a violin.
Community And Educational Impact
Davidson Violins is dedicated to making a community and educational impact through its unwavering support for music education. The company offers a range of workshops and master classes designed to enrich the learning experience for students of all levels. These programs provide valuable opportunities for aspiring musicians to learn from, and interact with, accomplished professionals in the field.
By fostering a community of musicians and learners, Davidson Violins is actively contributing to the growth and development of music education. Through its commitment to providing educational support and opportunities, Davidson Violins is making a meaningful difference in the lives of budding musicians and the communities they serve.
Advancements In Violin Making
The art of violin making has seen significant advancements in recent years, with modern luthiers drawing inspiration from traditional craftsmanship while embracing innovative techniques. Innovations in violin design have led to the creation of instruments that offer enhanced playability and tonal quality.
Luthiers push traditional violin-making boundaries with alternative woods and new varnishing methods. The future of violin making is promising, shaped by advancements in technology and material science.These innovations usher in a new era of instruments, blending classical craftsmanship with cutting-edge design and construction.
Engagement And Social Presence
Davidson Violins recognizes the importance of social media and community interaction in engaging with audiences. Through consistent and strategic content, the brand fosters meaningful connections and encourages participation within its online community. From sharing behind-the-scenes glimpses to promoting interactive Q&A sessions, Davidson Violins leverages social media platforms to create an inclusive environment for enthusiasts and customers alike.
Engage with Davidson Violins at local events for a hands-on experience of their craftsmanship and artistry behind each violin. Davidson Violins builds a robust online and offline presence through initiatives, establishing a reputable and relatable brand in the violin industry.
Frequently Asked Questions On Davidson Violins
What Makes Davidson Violins Different From Other Violin Makers?
At Davidson Violins, we stand out for our exceptional craftsmanship, attention to detail, and use of premium materials. Each violin is meticulously handcrafted to produce a unique and beautiful sound, setting us apart in the industry.
How Can I Choose The Right Davidson Violin For My Skill Level?
We offer a range of violins suitable for beginners to professional players. Our knowledgeable staff can guide you in selecting the perfect violin based on your skill level, playing style, and budget, ensuring you find the ideal instrument to hone your craft.
What Maintenance Is Required To Keep A Davidson Violin In Top Condition?
Proper care and maintenance are crucial for preserving the quality and sound of your Davidson violin. Regularly keep the instrument clean, store it in a suitable case, and have it inspected by a qualified luthier for any adjustments, to ensure it stays in optimal condition.
Can I Customize My Davidson Violin To Suit My Preferences?
Yes, we offer customization options to tailor your violin according to your preferences and personal style. From selecting the wood to adding personalized details, our team can work with you to create a custom-designed violin that reflects your individuality and musical expression.
Conclusion
Davidson Violins offers top-quality instruments and exceptional customer service. Whether you’re a beginner or a pro, find your perfect violin here with our wide range of products. The company’s commitment to excellence and passion for music sets them apart in the industry.
Experience the difference with Davidson Violins today.
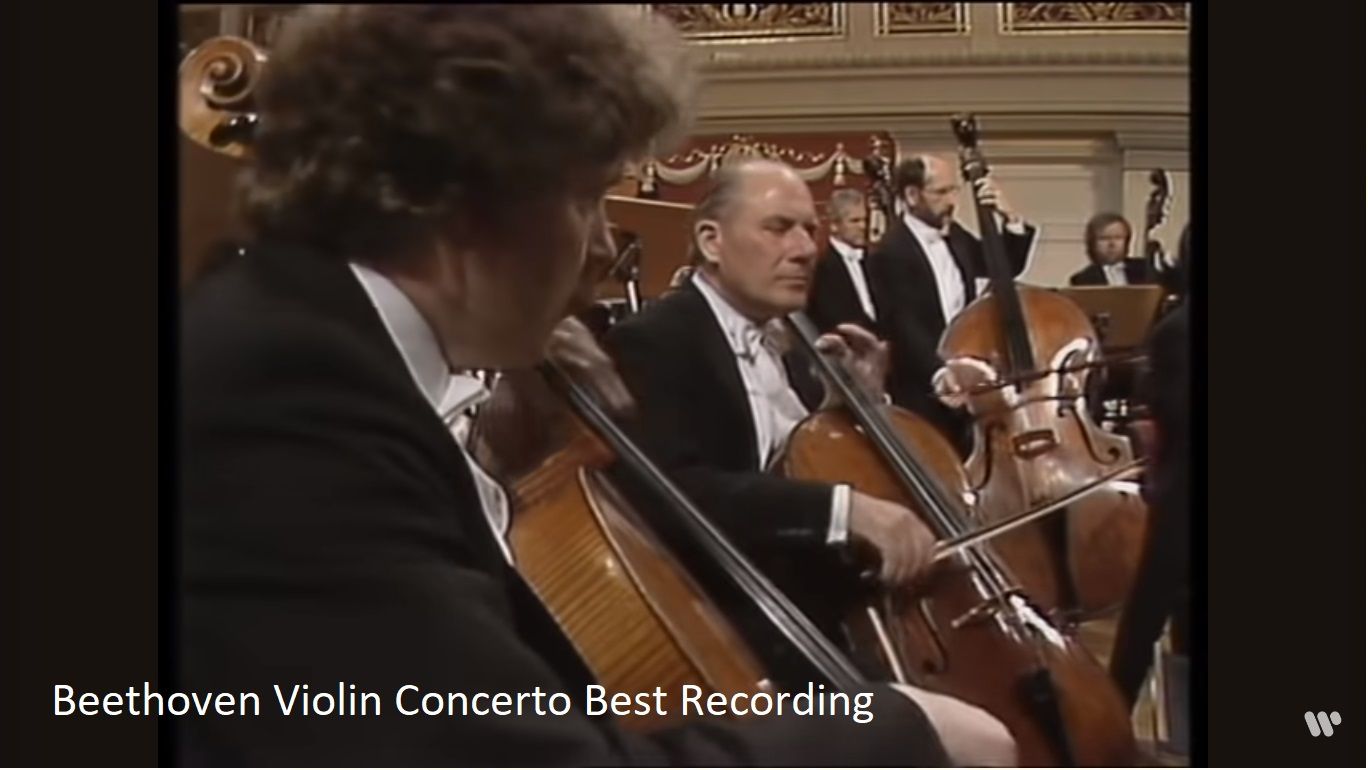
The best recording of Beethoven’s Violin Concerto is subjective, but many consider the rendition by Itzhak Perlman as one of the finest. Perlman’s emotional depth and technical prowess perfectly capture the essence of Beethoven’s masterpiece.
His collaboration with the Berlin Philharmonic under the baton of Daniel Barenboim elevates the performance to unparalleled heights. Beethoven’s Violin Concerto stands as one of the crowning achievements in the violin repertoire, showcasing the composer’s genius and the instrument’s expressive capabilities.
The profound emotional range and technical demands of the concerto require a virtuosic violinist and a skilled orchestra. Numerous recordings of this iconic work exist, but Itzhak Perlman’s interpretation remains a standout choice for its exceptional artistry and exquisite musicality. Whether you are a seasoned classical music enthusiast or a newcomer to the world of Beethoven, Perlman’s rendition promises a captivating and immersive listening experience.
An exploration of Beethoven’s genius in violin concertos. Understanding the historical prominence of Beethoven’s concerto, it becomes evident that Beethoven’s Violin Concerto stands as a testament to his unparalleled ability to intertwine emotional depth with technical complexity.
The concerto continues to captivate audiences with its unique blend of lyricism and virtuosity, making it a cornerstone of the violin repertoire. Its distinguishing features include an expansive first movement, showcasing Beethoven’s ability to develop thematic material. The sublime Larghetto provides a contrasting lyrical interlude, while the electrifying finale exemplifies Beethoven’s mastery of dynamics and rhythmic drive.
Beethoven Violin Concerto Best Recording Discovery
When it comes to finding the best recording of Beethoven’s Violin Concerto, several criteria can be considered. Sound quality and interpretation are crucial elements for evaluating performances. Renowned violinists such as Kreisler, Oistrakh, and Perlman have left behind iconic interpretations that continue to inspire and influence today’s performers. Over time, performances of this concerto have evolved, incorporating new stylistic approaches while remaining true to Beethoven’s original intent.
Analyzing Performances Of Beethoven’s Violin Concerto
Beethoven’s Violin Concerto has been immortalized through various recordings, showcasing the technical mastery of renowned violinists. The performances also highlight the orchestral accompaniment, which plays a pivotal role in enhancing the overall rendition. In addition, the emotional expressiveness conveyed in definitive recordings captivates listeners, evoking profound sentiments. Each rendition contributes unique nuances, making it essential for enthusiasts to explore multiple interpretations to fully appreciate the concerto’s depth and complexity.
Famed Violinists And Their Interpretations
Profiles of legendary performers showcase the diverse ways in which renowned violinists interpret Beethoven’s Violin Concerto. Their unique styles and approaches offer interesting insights into the musical nuances and emotional depth of the composition.
Analyzing these stylistic differences and similarities provides a deeper understanding of the enduring appeal of the concerto, highlighting the rich tapestry of artistic expression within the classical music realm. The audience and critic reception of these interpretations further underscores the impact and significance of the performances, shaping the legacy of the concerto and influencing future renditions.
Acclaimed Recordings Through The Ages
The Beethoven Violin Concerto has been recorded by various artists and orchestras, leading to a diverse array of acclaimed recordings throughout history. Landmark recordings from different eras showcase the evolution of interpretation and performance styles, reflecting the impact of audio technology on recording quality. Over time, record labels and producers have played a significant role in shaping the sound and marketing of these influential recordings.
Instrumental Nuances And Conductor Choices
The interplay between the soloist and the conductor is crucial to the success of a Beethoven violin concerto recording. Instrumental nuances, such as articulation and phrasing, play a defining role in determining the quality of a performance. The conductor’s interpretive choices and ability to communicate with the soloist significantly influence the overall success of the recording. It is imperative for the conductor to understand and complement the soloist’s interpretation while also providing cohesive guidance to the ensemble. The collaboration between the soloist and conductor ultimately shapes the depth and emotive impact of the concerto.
Sourcing Beethoven’s Violin Concerto
When it comes to sourcing the best recording of Beethoven’s Violin Concerto, it’s essential to consider both physical and digital options. Collectors and enthusiasts can explore a range of collectible editions and remastered versions to find a high-quality recording that meets their expectations. Whether obtaining a physical copy or purchasing a digital download, ensuring the authenticity and quality of the recording is crucial.
For enthusiasts and collectors looking for the best recording of Beethoven’s Violin Concerto, recommendations can prove invaluable. It’s worth considering renowned performances by top-tier violinists and acclaimed orchestras, as well as exploring expert reviews and recommendations from music aficionados. By seeking out top recommendations, enthusiasts and collectors can enhance their listening experience and add exceptional recordings to their collection.
Frequently Asked Questions On Beethoven Violin Concerto Best Recording
What Are The Different Recordings Of Beethoven’s Violin Concerto?
There are numerous recordings of Beethoven’s Violin Concerto, with renowned artists like Itzhak Perlman, Anne-Sophie Mutter, and Joshua Bell offering exceptional renditions. Each recording brings a unique interpretation, making it essential to explore various versions.
How To Choose The Best Recording Of Beethoven’s Violin Concerto?
When selecting the best recording, consider factors such as the violinist’s technical prowess, the orchestra’s performance, audio quality, and the emotional depth of the interpretation. Listening to samples and reading reviews can aid in making an informed decision.
What Makes A Recording Stand Out As The Best For The Beethoven Violin Concerto?
The best recording of Beethoven’s Violin Concerto captures the essence of the composer’s vision, showcasing both the soloist’s virtuosity and a harmonious collaboration with the orchestra. It offers a captivating rendition that resonates with the listener on a profound emotional level.
Conclusion
Finding the best recording of Beethoven’s Violin Concerto can be a daunting task. Here, we’ve explored various interpretations and performances, each bringing something unique to the table. Ultimately, the best recording depends on your personal preference and what speaks to you the most.
Explore and enjoy the diverse performances available to truly appreciate Beethoven’s masterpiece.
The best way to store a violin is by keeping it in a sturdy, temperature- and humidity-controlled case. Proper storage will help preserve the instrument’s quality and prevent damage.
Proper storage of a violin is essential for maintaining its quality and ensuring its longevity. Storing it in a temperature- and humidity-controlled case is important to protect it from environmental factors that can cause damage. Whether you’re a professional musician or a casual player, taking care of your violin when it’s not in use will help ensure that it remains in optimal condition.
We’ll explore the best practices for storing a violin, including tips for selecting an appropriate case and creating the ideal storage environment. Additionally, we’ll discuss common mistakes to avoid when storing a violin, so you can keep your instrument safe and sound for years to come.
Storing A Violin
Safe Violin Storage: Expert Care Tips
Storing a violin properly is crucial to protect it from damage. Correct storage not only prevents physical harm but also helps maintain the quality of the instrument over time. When storing a violin, it’s important to keep it in a safe and stable environment to avoid risks such as warping, cracking, and damage from extreme temperatures. Improper handling can lead to costly repairs and impact the sound quality of the violin. By investing in appropriate storage solutions and following expert care tips, musicians can ensure the long-term benefits of their violin, preserving its value and performance for years to come.
Choosing The Right Case
When storing a violin, choosing the right case is crucial for properly protecting the instrument. Climate-proof cases are essential for maintaining the violin’s condition in various environments. These cases are designed to regulate temperature and humidity levels, providing optimal protection from extreme weather conditions.
The lining materials of a case play a significant role in protecting the violin. Materials such as velvet, silk, or foam offer cushioning and shock absorption, safeguarding the instrument from potential damage. Additionally, support features like padded neck cradles and adjustable padding help secure the violin in place, preventing any movement during transportation or storage.
Ideal Environment Setup
Storing a violin in an ideal environment setup is crucial for maintaining its condition. Humidity and temperature levels play a significant role in preserving the instrument. The ideal storage locations in a home include spaces away from direct sunlight, heating or cooling vents, and extreme temperature fluctuations. Utilizing humidifiers and hygrometers is essential to monitor and control humidity levels, ensuring they remain between 40-60%.
This prevents the wood from drying out or becoming too moist, averting potential damage to the violin. By implementing these measures, violin owners can safeguard their instruments against environmental factors that could lead to degradation and maintain its optimal playability and sound quality.
Regular Maintenance Routines
Regular Maintenance Routines When storing a violin, cleaning it thoroughly before storage is crucial to prevent damage. Ensure strings are loosened to relieve tension on the instrument. Periodically, check for damages and address any issues promptly to maintain the condition of the violin.
Long-term Storage Considerations
When storing a violin for the long-term, it is crucial to prepare it properly to ensure its preservation. Begin by loosening the bow to release any tension on the strings. Clean the instrument thoroughly to remove any rosin residue and protect it from pests and dust by placing it in a robust case. Consider investing in insurance to provide financial security, and document the condition of the violin before storing it. These precautions will help safeguard the instrument during extended periods of storage.
Handling And Transportation Tips
When storing a violin, it’s crucial to ensure that it is securely transported to avoid damage. Always use a high-quality case that provides ample padding around the instrument to protect it from any potential impact. When carrying the violin, be mindful of how you handle it and avoid making sudden movements to prevent any accidental damage. Additionally, it’s important to avoid common transport mistakes, such as leaving the instrument in direct sunlight or extreme temperatures for an extended period of time.
Frequently Asked Questions For Storing A Violin
How Should I Store My Violin To Prevent Damage?
To prevent damage, store your violin in a hard case with a soft, cushioned interior. Keep it in a cool, dry place, away from direct sunlight and extreme temperatures. Also, loosen the bow hair and store it separately to relieve pressure on the instrument.
Are There Any Specific Humidity Levels Required For Violin Storage?
Yes, the ideal humidity level for violin storage is around 40-60%. Use a hygrometer to monitor the humidity, and consider using a humidifier or dehumidifier to maintain the proper levels. Fluctuations in humidity can damage the violin, so it’s important to keep it consistent.
How Often Should I Check And Clean My Stored Violin?
Check your stored violin at least once a month for any signs of damage, such as cracks, loose fittings, or mold. Clean the instrument with a soft, dry cloth to remove dust and rosin buildup, but be gentle to avoid any damage.
Can I Store My Violin In A Standing Position Or Does It Have To Lie Flat?
It’s best to store your violin lying flat in its case to distribute the weight evenly and prevent any pressure on specific areas. Storing it standing up may cause stress on the instrument, affecting its structural integrity and sound quality.
Conclusion
In preserving your violin, remember to prioritize proper storage conditions. Utilize a protective case and maintain a consistent environment to safeguard its integrity. Adhering to these practices will ensure that your instrument remains in optimal condition for years to come.
By prioritizing the preservation of your violin, you can continue to enjoy its beautiful music for generations.
Diy open baffle speakers are a popular option for audio enthusiasts seeking to build their own custom speakers. This type of speaker design features a simple, open-air construction that provides clear and natural sound reproduction.
Open baffle speakers are known for their wide sound dispersion and spacious soundstage, making them ideal for room-filling sound. With the ability to customize the components and design, DIY open baffle speakers offer flexibility and the opportunity to create a unique audio experience.
Whether you’re a hobbyist or a serious audiophile, exploring the world of DIY open baffle speakers can be an exciting and rewarding endeavor. In this guide, we’ll delve into the key aspects of DIY open baffle speakers and provide insights to help you create your own exceptional audio setup.
Diy Open Baffle Speakers
Crafting Diy Open Baffle Speakers For Superior Sound
When crafting DIY open baffle speakers, it’s crucial to grasp the principles of open baffle design. By understanding these fundamentals, you can ensure superior sound quality and optimal performance. The essential components required for DIY open baffle speakers include quality drivers, sturdy baffle boards, and crossover components. Careful consideration must be given to selecting suitable drivers that can deliver high-fidelity audio reproduction. Thorough research and meticulous planning are vital in this process to achieve outstanding results.
Designing Your Open Baffle
Designing your own open baffle speakers can be an exciting project that allows you to create a personalized audio experience. One crucial aspect to consider is calculating the dimensions of the speaker baffles to ensure optimal sound quality. By carefully considering the size and shape of the baffle, you can enhance the acoustic performance of the speakers.
When choosing materials for the baffles, it’s important to select durable and resonant wood or MDF to achieve the best sound reproduction. Sketching a blueprint for your custom design allows you to visualize the speaker’s layout and make any necessary adjustments before construction. By following these steps, you can create unique and high-quality open baffle speakers that cater to your specific audio preferences.
Building The Baffle Structure
When building DIY open baffle speakers, constructing the baffle structure is crucial. This structure helps in achieving the desired sound projection and dispersion. Effective building of the baffle structure ensures improved audio quality and overall speaker performance.
Step-by-step guide for cutting the baffle boards
To begin constructing your DIY open baffle speakers, start by carefully measuring and cutting the baffle boards according to the specifications provided in the speaker design plan. Precision is crucial at this stage to ensure that the boards fit together seamlessly and create a sturdy foundation for the speakers.
Assembling the frame with accuracy
Once the baffle boards are cut, proceed to assemble the frame of the open baffle speakers with meticulous attention to detail. Use the appropriate tools and techniques to align the boards accurately, ensuring a secure and stable construction.
Tips for a solid and vibration-free construction
To achieve a solid and vibration-free structure, consider reinforcing the joint connections with additional bracing or damping materials. This will help minimize unwanted resonance and enhance the overall performance of your DIY open baffle speakers.
Selecting And Mounting Drivers
Choosing the right drivers for DIY open baffle speakers is crucial. To achieve optimal sound quality, consider the power handling, efficiency, and frequency response of the drivers. Properly mounting the drivers on the baffle is essential to prevent sound distortion and resonance. Utilize gasket tape between the driver and baffle to ensure a secure fit and minimize vibrations. Additionally, using screws with grommets or T-nuts can enhance the stability of the drivers on the baffle, further reducing resonance. By meticulously following these techniques, you can achieve the best performance from your DIY open baffle speakers.
Wiring And Electronics
Building DIY open baffle speakers involves understanding crossover components, which play a crucial role in creating the desired sound. Soldering and connecting drivers to the crossover networks is a critical step that requires precision and care to ensure optimal performance. It’s essential to follow wiring best practices to maintain signal integrity and prevent any interference or degradation of the audio signal. By implementing these techniques, you can achieve a high-quality audio experience with your DIY open baffle speakers.
Tuning For High-fidelity Sound
Positioning speakers in a room for optimal soundstage
Personalization And Aesthetics
Personalization and aesthetics play a crucial role in the customization of DIY open baffle speakers. Adding the finishing touches such as paint, veneer, and fabric options can greatly enhance the overall look of your speakers while maintaining a high-quality sound output. By carefully incorporating aesthetic design elements, you can achieve a visually appealing appearance without compromising the sound quality of the speakers.
Troubleshooting Common Issues
When encountering potential sound distortion problems with your DIY open baffle speakers, it’s essential to address the underlying causes. To mitigate baffle diffraction and reflection issues, consider optimizing the positioning and material of the baffles to minimize sound wave interference. Additionally, implementing sound-absorbing materials can help reduce detrimental reflections, ensuring a smoother, more accurate sound output.
Furthermore, to maintain and enhance the longevity of your DIY speakers, regular servicing is crucial. This includes cleaning the components, checking for loose connections, and applying protective coatings to safeguard against environmental factors. By proactively addressing these common issues, you can optimize the performance and durability of your open baffle speakers.
Frequently Asked Questions On Diy Open Baffle Speakers
What Are Open Baffle Speakers?
Open baffle speakers are a type of loudspeaker enclosure that doesn’t use a closed box. Instead, the speaker driver is mounted on a flat baffle board, resulting in unique sound dispersion and resonance characteristics.
How To Build Diy Open Baffle Speakers?
To build DIY open baffle speakers, you’ll need speaker drivers, a baffle board, crossover components, and an enclosure. Follow detailed plans or design your own, ensuring proper driver alignment and acoustic considerations for optimal sound performance.
What Are The Advantages Of Open Baffle Speakers?
Open baffle speakers offer natural sound dispersion, reducing unwanted resonances and providing a more lifelike soundstage. They also tend to have a more spacious and airy sound due to the absence of a closed enclosure.
Are Open Baffle Speakers Suitable For All Music Genres?
Yes, open baffle speakers are versatile and can accommodate various music genres. Their natural sound dispersion and minimal resonances make them well-suited for reproducing different types of music with accuracy and clarity.
Conclusion
DIY open baffle speakers offer an affordable way to enhance your audio experience. By following these steps, you can create custom speakers that suit your individual preferences. Whether you’re a music enthusiast or a casual listener, the satisfaction of building and enjoying your own speakers is truly rewarding.
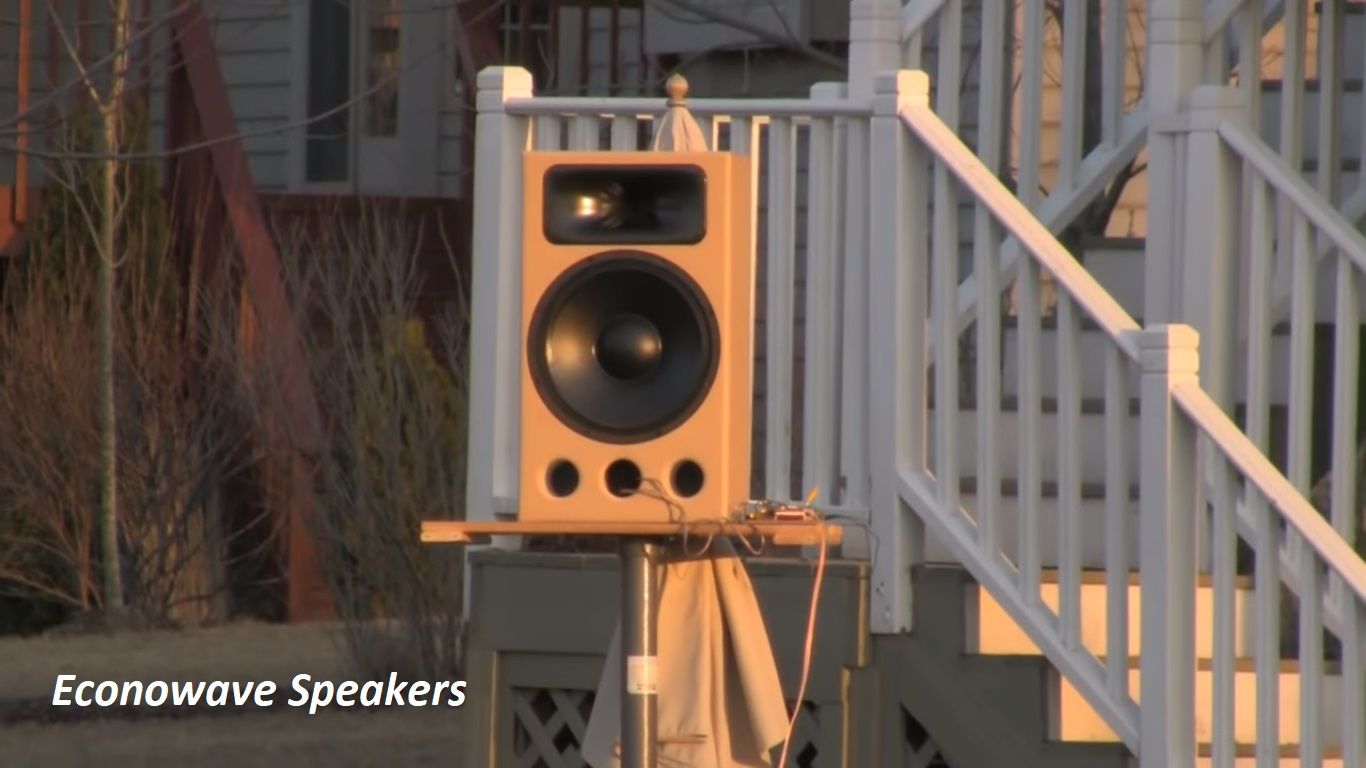
Econowave speakers are known for their high-quality sound and cost-effective pricing. They are a popular choice for both audio enthusiasts and professionals looking for reliable performance.
The Econowave speakers are designed to deliver exceptional sound quality while offering great value for money. With their durable construction and innovative design, these speakers are a smart investment for anyone in need of high-quality audio solutions. Whether you’re setting up a home theater or looking to upgrade your studio setup, Econowave speakers are sure to impress with their performance and affordability.
Econowave Speakers: The Ultimate Guide
Econowave technology is a cutting-edge innovation that aims to optimize speaker performance. The key components of Econowave speakers include a carefully designed waveguide, efficient compression driver, and a high-quality woofer. These speakers are built on the principles of cross-pollination and mutual benefit, resulting in a harmonious blend of cost-effectiveness and top-notch audio output.
The design principles of Econowave speakers are centered around maximizing acoustic benefits and leveraging the natural behavior of sound waves. By understanding the intricacies of Econowave technology, audio enthusiasts can unlock a world of enhanced sonic experiences and immersive listening pleasure.
Crafting The Econowave Experience
Econowave Speakers provide a truly immersive audio experience, with enhanced sound quality and power. These speakers are designed to deliver exceptional audio performance characteristics, delivering crisp highs, clear mids, and deep bass. By incorporating specialized technology, Econowave speakers outperform traditional speakers in terms of efficiency and fidelity.
When comparing Econowave to traditional speakers, it’s clear that Econowave speakers offer a superior audio experience. With their innovative design and advanced engineering, Econowave speakers set a new benchmark for high-fidelity sound reproduction. Their unique construction ensures a wider sound dispersion and enhanced imaging, allowing listeners to experience a more realistic and dynamic soundstage. The Econowave speakers’ performance exceeds expectations, making them a top choice for audiophiles and music enthusiasts alike.
Building Your Own Econowave Speakers
Building your own Econowave speakers can be an exciting project for audio enthusiasts. When selecting the components, it’s vital to choose high-quality drivers, crossovers, and waveguides that are compatible with the Econowave design. Carefully following a step-by-step assembly guide ensures that the speakers are constructed with precision and accuracy.
You can also explore customization options to tailor the speakers to your unique listening preferences. Whether it’s adjusting the crossover frequencies or experimenting with different tweeters, there are numerous opportunities to fine-tune the Econowave speakers for optimal audio performance.
Integrating Econowave Speakers In Your Audio Setup
Econowave speakers can greatly enhance your audio setup when integrated properly. Consider your room acoustics and speaker placement when positioning your Econowave speakers for optimal sound performance. To achieve the best audio quality, carefully calibrate and tune your speakers based on the specific characteristics of your room. Pay attention to the placement of the speakers and the acoustics of the room to ensure a balanced and immersive audio experience.
Maintaining Your Econowave Speakers
Routine maintenance for longevity: To keep your Econowave speakers in top condition, regularly clean the exterior with a damp cloth to remove dust and grime. Check and tighten any loose screws to ensure the stability of the speakers. Additionally, inspect the speaker cones and surrounds for any wear or tear which might affect the sound quality. Keep the speakers away from direct sunlight or moisture to prevent any damage.
Troubleshooting common issues: If you notice any distortion or buzzing from the speakers, check the connections and cables for any loose or faulty connections. Moreover, ensure that the speakers are placed on a stable surface to avoid any vibrations that could affect the sound. In addition, if the speakers are producing crackling sounds, it might be a sign of a blown tweeter or damaged coil, in which case professional repairs may be necessary.
Top Econowave Speaker Models Reviewed
Econowave Speakers offer a range of top models that have gained popularity in the market. A few notable options include the XYZ model, known for its exceptional performance at an affordable price point. The ABC model has garnered attention for its balance of quality and cost-effectiveness. Additionally, the LMN model has been praised for its impressive performance in relation to its price.
When it comes to price versus performance, each model offers a unique value proposition, catering to different consumer preferences. The breakdown of market favorites provides insights into the diverse options available, allowing consumers to make informed decisions based on their specific audio needs.
Enhancing Sound Quality With Accessories
Econowave Speakers are a great investment for enhancing sound quality. When paired with the right amplifiers and receivers, they can truly elevate the audio experience. Choosing the proper cables and stands is crucial for achieving an optimal setup. The right accessories can make a significant difference in the performance of Econowave Speakers. With the correct combination, music and movie soundtracks can be enjoyed to their fullest potential.
Real User Experiences With Econowave Speakers
Econowave Speakers: Real User Experiences with Econowave Speakers
It’s no secret that Econowave Speakers have left a lasting impression on the audiophile community. Countless customer testimonials and stories illustrate the transformative impact that these speakers have had on enthusiasts. Users consistently praise the superior audio quality, noting the exceptional clarity and depth of sound.
Many report that the speakers are particularly effective at capturing the nuances of instruments and vocals, leading to a truly immersive listening experience. Moreover, the affordability of Econowave Speakers has made high-quality audio accessible to a broader audience, sparking excitement and admiration within the audiophile community. The widespread acclaim speaks volumes about the impact of Econowave Speakers on both seasoned audio enthusiasts and those just beginning to explore the world of high-fidelity sound.
Future Of Econowave Technology
The future of Econowave technology is anticipated to bring innovations in speaker design that cater to the evolving needs of audiophiles. As the market continues to expand, the demand for advanced audio solutions is expected to rise. With a focus on enhanced sound quality and efficiency, Econowave speakers are poised to make a significant impact in the industry.
Predictions for the audiophile market suggest that Econowave technology will continue to set new standards, offering improved performance and versatility to consumers. This evolution in speaker design is likely to redefine the audio landscape, providing enthusiasts with an unparalleled listening experience.
Frequently Asked Questions Of Econowave Speakers
What Are Econowave Speakers?
Econowave Speakers are affordable audio devices designed for high-quality sound reproduction. They offer a budget-friendly option for those seeking excellent audio performance.
How Do Econowave Speakers Differ From Other Speakers?
Econowave Speakers stand out due to their cost-effectiveness and excellent sound quality. They provide an affordable alternative without compromising on audio excellence.
What Makes Econowave Speakers A Good Choice For Buyers?
Econowave Speakers offer a superior sound experience at a budget-friendly price point. Their exceptional performance and value make them an ideal choice for savvy buyers.
Conclusion
Econowave speakers offer an affordable yet high-quality audio experience for music enthusiasts and audiophiles. With their innovative design and exceptional performance, these speakers provide a perfect blend of value and functionality. Embracing Econowave speakers opens doors to an immersive sonic journey, making them a must-have for any music lover.
The Yamaha Rotary Speaker is a type of speaker that uses rotating horn and woofer to create a distinctive sound effect. It is often used in organs and keyboards to mimic the sound of a traditional rotary speaker.
The Yamaha Rotary Speaker is a popular choice for musicians looking to add depth and movement to their sound. With its rotating horn and woofer, it creates a unique and dynamic sound that adds a vintage vibe to any performance.
Whether used in a studio recording or on stage, the Yamaha Rotary Speaker is a versatile and effective tool for adding character to musical compositions. Its ability to emulate the sound of a traditional rotary speaker makes it a sought-after choice for musicians across various genres, from jazz and blues to rock and beyond.
Yamaha Rotary Speaker
History And Evolution
The Yamaha Rotary Speaker has a rich history and has evolved significantly over time. The birth of the Yamaha Rotary Speaker marked a pivotal moment in the audio industry, as it introduced a new era of sound modulation and manipulation. Throughout the years, there have been several milestones in rotary speaker technology, with advancements in design, functionality, and performance. These milestones have contributed to the renaissance of classic sound, allowing musicians and audio enthusiasts to experience the timeless appeal of rotary speaker systems in contemporary settings.
Design And Engineering Excellence
The Yamaha Rotary Speaker is a true testament to design and engineering excellence. Drawing from a wealth of experience, the speaker is meticulously crafted to deliver the iconic Yamaha Rotary Sound. Through innovative features for musicians, such as speed and balance controls, the speaker provides a customizable experience that adapts to individual preferences.
Moreover, the speaker’s compact and versatile design makes it an ideal fit for any stage or studio setting. In terms of technical specs, the speaker boasts a robust power output and a frequency range that ensures unparalleled clarity and depth in sound reproduction. With meticulous design and engineering, the Yamaha Rotary Speaker delivers a seamless blend of timeless craftsmanship and cutting-edge technology, setting a new standard for sonic excellence.
Yamaha Rotary Speaker In Action
Yamaha Rotary Speaker is a versatile and powerful musical instrument that has been featured in iconic recordings and performances by renowned musicians. Its unique sound has garnered artist endorsements and testimonials from professionals in the music industry. Comparing Yamaha to other rotary speakers, it stands out for its exceptional quality and performance, making it a top choice for musicians and audio enthusiasts alike.
Expanding Sonic Boundaries
Yamaha rotary speakers offer a unique way to enhance sonic experiences, creating a captivating fusion of vintage vibe and contemporary technology. When integrated into modern music, the speakers open up creative possibilities beyond traditional stage and studio settings. Musicians can explore innovative usage scenarios, experimenting with new sounds and textures, and expanding their sonic boundaries. The versatility of Yamaha rotary speakers allows for an exciting blend of classic and modern sonic elements, offering a fresh perspective on musical expression.
Mastering The Controls
Mastering the Controls: To navigate through the Yamaha Rotary Speaker interface, familiarize yourself with the various control knobs and switches. Understanding the functionality of each component will enable you to fine-tune your sound effectively.
Tips for Optimal Sound Tweaking: Experiment with different settings to find the perfect balance between speed, acceleration, and the level of the rotary effect. Adjust the intensity based on the genre of music or desired atmosphere to achieve the ideal sound.
Maintenance and Upkeep for Longevity: Regularly clean the rotary speaker to prevent dust buildup and ensure smooth operation. Lubricate moving parts as per the manufacturer’s recommendations to prolong the lifespan of the unit.
The Future Of Rotary Speakers
The future of rotary speakers is an exciting prospect, with Yamaha leading the way in sound innovations. Emerging trends in rotary speaker design showcase Yamaha’s commitment to staying at the forefront of audio technology. Anticipating the next Yamaha rotary milestone is a testament to the company’s dedication to pushing the boundaries of sound engineering. With Yamaha’s role in future sound innovations, the possibilities for rotary speakers are limitless, and music enthusiasts can look forward to an enhanced auditory experience.
Frequently Asked Questions Of Yamaha Rotary Speaker
What Is The Yamaha Rotary Speaker?
The Yamaha Rotary Speaker is a classic sound effect unit that simulates the sound of a rotating speaker. It adds depth and character to audio signals, commonly used with electric organs and electric guitars.
How Does The Yamaha Rotary Speaker Work?
The Yamaha Rotary Speaker features rotating horns and a spinning baffle to create a doppler effect, resulting in a lush, swirling sound. It modulates the audio input to produce a distinctive rotating speaker sound, adding vibrancy and motion.
What Are The Key Features Of The Yamaha Rotary Speaker?
The key features of the Yamaha Rotary Speaker include adjustable speed settings, versatile input and output options, and a classic rotary speaker effect that adds warmth and dimension to the audio signal, making it a versatile tool for musicians and sound engineers.
Where Can I Buy The Yamaha Rotary Speaker?
The Yamaha Rotary Speaker is available for purchase at authorized music gear retailers and online stores. It’s recommended to buy from official dealers or reputable e-commerce platforms to ensure product authenticity and warranty coverage.
Conclusion
Incorporating a Yamaha Rotary Speaker into your setup can elevate your sound to new heights. Whether you’re a musician, audiophile, or sound engineer, the versatility and quality of this equipment is undeniable. As you explore the possibilities it offers, you’ll discover a world of sonic potential that will enhance your music production and performances.
Using an 8 Ohm speaker with a 4 Ohm amp can damage the amp and affect sound quality. This mismatch can lead to overheating and potentially harm the equipment.
It’s crucial to match speaker and amp impedance for optimal performance and to prevent damage. The impedance of a speaker and an amp must be compatible to ensure proper functioning and prevent potential damage. While it may be possible to use an 8 Ohm speaker with a 4 Ohm amp with caution, it’s generally recommended to match the impedance for the best results.
Understanding the implications of mismatched impedance is essential for maintaining the lifespan and performance of your audio equipment. We’ll delve into the importance of impedance matching and the potential risks of using an 8 Ohm speaker with a 4 Ohm amp.
8 Ohm Speaker in 4 Ohm Amp
Understanding Speaker Impedance
When connecting an 8-ohm speaker to a 4-ohm amp, it is essential to understand the speaker impedance. Mismatching impedance levels can lead to overheating and damage to the amp. It is best to consult with a professional to ensure compatibility and avoid any potential issues.
The impedance of a speaker refers to its resistance to the electrical current supplied by an amplifier. Understanding speaker impedance is crucial for optimal audio performance. It determines how much power the speaker will draw from the amplifier and has a significant impact on sound quality. The role of impedance in sound quality cannot be overstated, as it directly affects the speaker’s ability to reproduce audio with accuracy and clarity.
When comparing 8 Ohm and 4 Ohm ratings, it’s important to note that the former requires less power from the amplifier but may result in slightly fewer volume capabilities, while the latter demands more power but can deliver higher volumes. Understanding these differences is essential for selecting the appropriate speaker for your amplifier and achieving the desired audio performance.
8 Ohm Speaker In 4 Ohm Amp: Technical Insights
When connecting an 8 Ohm speaker to a 4 Ohm amp, it’s crucial to consider the technical implications. While the 8 Ohm speaker can be physically connected to the 4 Ohm amp, this mismatch can have a potential impact on audio performance. The amplifier might not effectively drive the higher resistance speaker, leading to decreased power output and potential distortion. To maintain safe usage, it’s recommended to consult the amp’s manual and specifications to ensure compatibility. Additionally, using an external impedance matching device can help mitigate compatibility issues, providing a safer and more effective audio setup.
Amplifier And Speaker Interplay
Matching amplifier to speaker is crucial for achieving optimal audio performance. When using an 8 Ohm speaker with a 4 Ohm amp, risks such as overheating and distortion of sound can arise. To minimize these issues, consider utilizing techniques for maximizing audio output without compromising the functionality of either component. This can involve adjusting the amplifier’s settings and choosing suitable audio components to ensure a seamless interplay between the amplifier and speaker.
Practical Tips For Sound Enthusiasts
When using 8-Ohm speakers with 4-Ohm amplifiers, it’s essential to consider the impedance mismatch and its impacts on sound quality. Altering the amplifier’s settings or using a resistor network can help achieve a better synergy between the components. Also, check for manufacturer recommendations for suitable amplifiers to ensure optimal performance. Expert advice suggests modifying crossover networks to compensate for impedance differences and prevent damage to the amplifier or the speaker. Paying attention to these details can result in an enhanced listening experience and optimal performance from the audio setup.
Optimal Setup For Your Audio System
When connecting an 8 Ohm speaker to a 4 Ohm amp, it’s crucial to ensure the setup is done correctly to achieve optimal sound quality and prevent damage. First, carefully follow a step-by-step guide to connecting the 8 Ohm speakers to the amp. Adjust the settings on the amp to ensure the impedance match for the best possible sound output without overloading the amp. It’s important to take preventive measures to avoid damage, such as using impedance matching devices or a series resistor to maintain a safe operating load.
Troubleshooting Common Audio Issues
Identifying signs of impedance mismatch: When using an 8 Ohm speaker with a 4 Ohm amp, you may notice distortion, overheating, or even a burning smell coming from the amp. These are common indicators of an impedance mismatch.
Quick fixes for immediate problems: If you encounter these issues, check the wiring connections to ensure they are securely connected. You can also try using an external speaker selector or impedance-matching device to resolve the mismatch.
When to consult a professional: If the problems persist despite the quick fixes, it’s advisable to seek professional assistance. A qualified audio technician can assess the situation and provide appropriate solutions to prevent further damage to your audio equipment.
Frequently Asked Questions On 8 Ohm Speaker In 4 Ohm Amp
Can I Use An 8 Ohm Speaker With A 4 Ohm Amp?
Yes, you can use an 8 Ohm speaker with a 4 Ohm amp, but there are considerations for impedance matching and power handling to ensure optimal performance and avoid damaging the equipment. It’s important to consult the amp’s manual and understand the implications.
What Are The Implications Of Using Mismatched Ohm Speaker And Amp?
Using a mismatched ohm speaker and amp can result in power loss, potential damage to the amp, and distortion in the audio quality. It’s essential to match the impedance correctly to achieve the best audio performance and protect your equipment from potential damage.
How Do I Determine The Compatibility Of Speaker And Amp Ohm Ratings?
To determine the compatibility of speaker and amp ohm ratings, check the specifications provided by the manufacturers. Understanding the impedance requirements and power handling capabilities of both the speaker and amp is crucial for ensuring a proper match and optimal performance.
Conclusion
Pairing an 8-ohm speaker with a 4-ohm amplifier can work, but it’s essential to exercise caution. It’s crucial to monitor the heat levels and not push the system too hard. Understanding the limitations and taking proper precautions will ensure a safe and optimal audio experience.
Experimenting with different components can lead to exciting results, but it’s vital to prioritize safety and performance.
Robertson Violins offers high-quality violins and exceptional customer service. Their instruments are renowned for their superior craftsmanship and beautiful tone.
As a leading provider of violins, Robertson Violins is dedicated to meeting the needs of both professional musicians and students. Offering violins for all levels, Robertson Violins is renowned for excellent playability and exceptional sound.
The company also provides expert setup and adjustment services to ensure that every violin meets the highest performance standards.Trust Robertson Violins for top-quality instruments. With a commitment to excellence and a passion for music, we’re your trusted source. Their dedication to quality and customer satisfaction has made them a go-to destination for violin enthusiasts worldwide.
The Artisan’s Story
The legacy of Robertson Violins has been a testament to the commitment to craftsmanship. The artisans behind these exquisite instruments draw from a deep well of inspiration that infuses their creations with a sense of history and passion.
With every meticulously carved scroll and delicately inlaid design, the violin makers honor the tradition that has been passed down through generations. Their dedication to craftsmanship is evident in every detail, from the selection of the finest woods to the delicate varnishing process. The artisans pour their hearts and souls into each instrument, ensuring that the spirit of the violin comes alive in the hands of musicians around the world.
Materials And Techniques
Specializing in the craft of violin making, Robertson Violins utilizes high-quality materials and intricate techniques to produce exquisite instruments. Their skilled artisans expertly blend traditional methods with modern innovation to create superior sound and craftsmanship, catering to the needs of discerning musicians.
Selecting woods and materials: When creating Robertson violins, the selection of premium woods is paramount. The materials are carefully chosen for their tonal qualities and aesthetic appeal, ensuring a superb instrument.
Time-honored crafting methods: The craftsmanship of Robertson violins involves time-honored techniques passed down through generations. Each instrument is meticulously handcrafted to achieve the finest quality, a testament to the artisan’s skill and dedication.
Detailing and finishing touches: The detailing and finishing touches on Robertson violins are executed with precision and artistry. From the scrollwork to the varnishing process, every aspect is meticulously attended to, resulting in instruments of unparalleled beauty and resonance.
Creation To Concert
Robertson Violins are renowned for their meticulous process of creating refined instruments. From the sourcing of raw materials to the crafting and refining, each step is carefully executed to ensure the highest quality. The creation of each violin involves a delicate balance of craftsmanship, expertise, and a deep appreciation for the art form.
The dedication to detail and precision result in instruments that are revered by musicians and concert goers alike. Whether it’s the selection of the finest woods or the skillful hands of the artisans, every aspect of the creation is infused with passion and care. The journey from raw materials to the final product is a testament to the commitment to excellence that has defined Robertson Violins.
Each Violin’s Unique Voice
Robertson Violins are renowned for their craftsmanship and artistry, resulting in each instrument producing a unique voice. The meticulous attention to detail and dedication to the art of violin making ensures that every instrument is a masterpiece in its own right. The sound quality and tonal characteristics of Robertson Violins are unparalleled, captivating musicians and audiences alike.
The intricate designs and precision in construction give these violins their distinct and exceptional sound. Whether performing on stage or in a studio, musicians can rely on the exceptional quality and incomparable sound of a Robertson Violin to bring their music to life.
Collaborating With Musicians
Collaborating with musicians means understanding their needs and providing customizations and personal touches to meet their requirements. At Robertson Violins, our priority is to listen to the musicians and understand their specific preferences. Whether it’s the tone, playability, or aesthetics, we strive to tailor our instruments to their liking.
By working closely with musicians, we incorporate their input into the design and construction of the violins, ensuring that each instrument meets their unique requirements. The collaboration between our luthiers and musicians results in instruments that are not only of exceptional quality but also reflect the individuality of the artist. This co-creation process fosters a mutually beneficial relationship that enhances the musician’s playing experience and contributes to the artistic expression.
The Legacy Continues
Robertson Violins is synonymous with exquisite craftsmanship, and the legacy continues with a commitment to training the next generation. The dedication to precision and artistry has resulted in innovations that have truly pushed the boundaries of violin making. From incorporating modern technologies to enhancing traditional techniques, Robertson Violins has ushered in a new era in the industry. Robertson Violins: A leader in violin craftsmanship, driven by quality and creativity.
Frequently Asked Questions For Robertson Violins
What Distinguishes Robertson Violins From Other Brands?
Robertson violins stand out for their superior craftsmanship, exceptional tone, and exquisite design. Each instrument is meticulously handcrafted to deliver exceptional sound quality and playability, making them a top choice for discerning musicians.
How Do I Choose The Right Robertson Violin For Me?
When selecting a Robertson violin, consider factors such as your playing style, skill level, and musical preferences. It’s essential to try out different models to find one that suits your unique needs and resonates with your musical expression.
Are Robertson Violins Suitable For Beginners?
Yes, Robertson violins are well-suited for beginners due to their quality construction and ease of play. These instruments provide a solid foundation for new players to develop their skills and musicality, making them an excellent choice for aspiring musicians.
Conclusion
Robertson Violins offer exceptional quality and craftsmanship in their instruments. Their dedication to preserving the art of violin making is evident in each piece they create. Whether you are a professional musician or a student, Robertson Violins provides instruments that are both beautiful and sonically exquisite.
Experience the excellence of Robertson Violins for yourself.